Are you someone who dreams of safeguarding history, carefully restoring a treasured artifact, or bringing an ancient structure back to life? If so, you know the immense passion and meticulous skill that goes into heritage conservation and restoration.
It’s a field where every detail counts, and your tools are an extension of your hands and expertise. I’ve personally seen how the right equipment can make all the difference, transforming a challenging task into a rewarding triumph, especially when you’re facing those crucial certification exams or diving into a complex project.
With new technologies constantly emerging, from advanced imaging devices to innovative cleaning solutions, choosing your toolkit has become more exciting and critical than ever before.
What worked a decade ago might be outdated today, and staying on top of the latest advancements is key to truly excelling. Believe me, you don’t want to get caught unprepared!
Let’s explore exactly what you’ll need to truly master your craft and pass those rigorous assessments.
The Old Faithfuls: Your Hands-On Essentials

Heritage conservation is often about getting up close and personal, and that means relying on a set of fundamental hand tools that are truly an extension of your own meticulous touch.
I’ve spent countless hours in workshops and out in the field, and I can tell you, no fancy gadget can ever replace the precision and feel of a well-chosen trowel or a perfectly weighted hammer.
These aren’t just tools; they’re partners in discovery and restoration. Think about those delicate moments when you’re carefully removing grime from a priceless fresco or gently prying apart two fragile components – that’s where the quality and ergonomics of your hand tools really shine.
It’s not just about getting the job done, it’s about doing it right, without causing further damage. I’ve seen some incredible transformations happen with just a few basic, high-quality instruments, and it truly makes you appreciate the craft.
When I started, I tried to save a few bucks on cheaper alternatives, and I quickly learned my lesson; the frustration of a tool that doesn’t quite fit or breaks mid-task is not worth it.
Investing in quality from the start is genuinely an investment in your sanity and the integrity of your work.
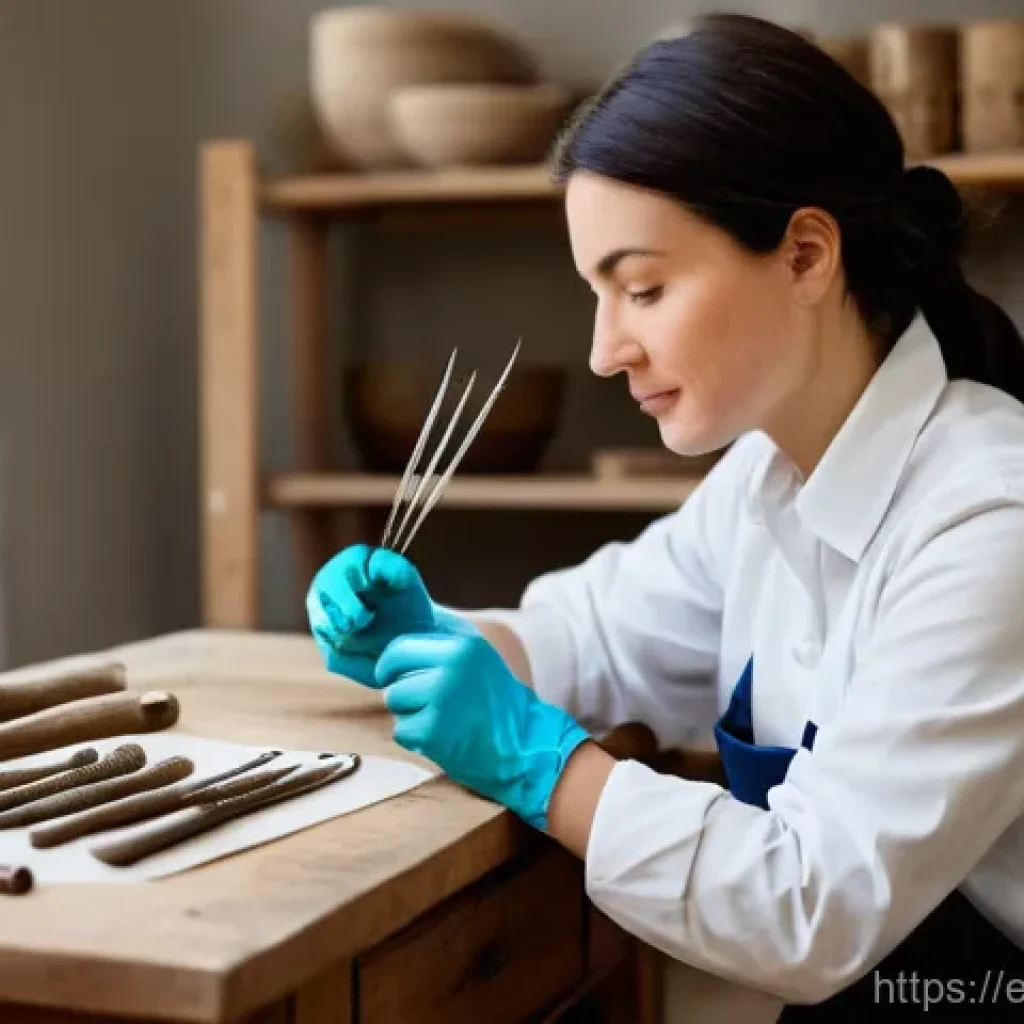
Precision Picks and Probes: Your Eyes and Fingers
You know those moments when you’re trying to understand the layers of an artifact or gently lift a fragment without disturbing its surroundings? That’s where a fantastic set of precision picks and probes becomes absolutely indispensable.
I remember working on an ancient ceramic piece, trying to separate some old, crumbling mortar from its original surface. My thin, flexible dental-style picks were like magic, allowing me to delicately chip away at the extraneous material without putting any undue pressure on the fragile pottery.
It really felt like I was performing surgery! Different tips – curved, straight, angled, incredibly fine – allow you to get into every tiny crevice and around every delicate edge.
It’s all about control and tactile feedback. You want tools that feel light in your hand but strong enough not to bend or break under gentle pressure.
Believe me, finding that perfect balance is key, especially when your eyes might not catch every microscopic detail, but your fingertips certainly will, guided by a perfectly crafted probe.
They are your extended senses, allowing you to “feel” the material and its resistances, which is a nuanced skill you develop over time and with the right equipment.
Brushes and Spatulas: Gentle Giants
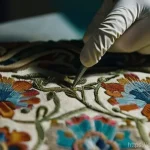
When it comes to cleaning, applying consolidants, or even just carefully dusting a surface, the right brush or spatula can make all the difference. I’ve got a collection of natural bristle brushes, from soft camel hair to stiffer hog bristles, each with its own specific purpose.
For removing loose dirt from a textile without abrading it, nothing beats a super-soft fan brush. But for carefully scraping away a stubbornly adhered layer on a stone sculpture, a robust yet flexible palette knife or a firm bristle brush is what you need.
And spatulas? Oh, they are multi-talented! From mixing tiny batches of adhesive to applying fills, or even gently supporting a fragile edge, a good set of stainless steel spatulas, ranging from microscopic to wider blades, is non-negotiable.
I personally prefer ones with a bit of flex but still maintain their edge. I can’t tell you how many times a well-selected spatula has saved me from a potential mishap, allowing me to apply just the right amount of pressure or product.
It’s a subtle art, truly, knowing which tool to reach for in a given situation, but with experience, it becomes second nature, and these gentle giants become your trusted allies.
| Tool Category | Essential Examples | Primary Use in Conservation |
|---|---|---|
| Precision Hand Tools | Dental picks, micro-spatulas, scalpels | Delicate cleaning, material removal, detailed adjustments |
| Brushes & Applicators | Soft natural bristle brushes, synthetic brushes, pipettes | Dusting, applying liquids/gels, fine cleaning |
| Measuring & Marking | Calipers, micrometers, rulers, pencils | Accurate dimensioning, documentation, marking repairs |
| Cleaning Tools | Cotton swabs, sponges, specialized erasers | Targeted dirt removal, surface preparation |
| Adhesive & Filling Tools | Mixing palettes, small spatulas, syringes | Preparing and applying consolidants and fillers |
Stepping Up Your Game: Advanced Tech for Deeper Insights
While those tried-and-true hand tools are the backbone of our craft, the world of heritage conservation is constantly evolving, and embracing new technologies can truly elevate your work.
I’ve seen firsthand how advanced imaging and diagnostic equipment can unlock secrets that were previously invisible to the naked eye, saving countless hours of guesswork and potentially preventing irreversible damage.
It’s like having x-ray vision and microscopic capabilities all rolled into one! When I first started experimenting with some of these devices, I was genuinely astounded by the level of detail they could reveal – hidden repairs, underlying sketches on paintings, even subtle structural weaknesses within a historic wall.
It really opens up a whole new dimension of understanding an artifact or structure. Learning to operate these tools might seem daunting at first, but the payoff in terms of accuracy, depth of analysis, and overall project success is absolutely immense.
They’re not just fancy gadgets; they’re crucial analytical instruments that provide objective data, helping you make far more informed decisions about conservation strategies.
Capturing Every Detail: High-Resolution Photography and 3D Scanning
Documentation is paramount in our field, and high-resolution photography has been a staple for ages, but it’s come so far. Modern digital cameras with macro lenses allow us to capture incredibly fine surface details, textures, and subtle color shifts that are vital for monitoring changes or planning interventions.
But honestly, the real game-changer for me has been 3D scanning. I remember working on a complex carved wooden panel that had suffered significant damage.
Traditional photographic documentation was helpful, but trying to accurately map out the missing sections and plan for reconstruction was a nightmare.
Then we brought in a handheld 3D scanner, and suddenly, we had a perfect digital model, accurate down to fractions of a millimeter. It was like magic!
We could virtually “fill in” the gaps, measure volumes, and even 3D print missing components for trials. This technology has utterly transformed how we approach complex structural and aesthetic reconstructions, providing an unparalleled level of precision and insight.
It’s not just about pretty pictures; it’s about creating an undeniable, measurable record.
The Power of Thermal Imaging: Uncovering Hidden Flaws
Imagine being able to “see” what’s happening beneath the surface of a wall or a painting without ever touching it. That’s precisely what thermal imaging allows us to do, and it’s become an indispensable part of my toolkit for preliminary assessments.
I once used a thermal camera on a historic building to try and understand the extent of a mysterious damp issue. To my surprise, it revealed not just areas of moisture, but also hidden structural elements and voids that weren’t visible otherwise.
It was an absolute revelation! The variations in surface temperature can indicate anomalies like delamination in plaster, hidden moisture pockets, air leakage, or even structural cracks that impact thermal conductivity.
For conservators, this means we can pinpoint problem areas non-invasively, guiding more targeted and less destructive investigations. It’s a fantastic first-pass diagnostic tool that helps prioritize interventions and understand the underlying condition of a material or structure before you even think about picking up a chisel or a probe.
Trust me, being able to identify problems before they become catastrophic is priceless in our line of work.
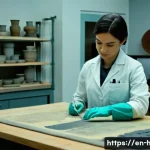
The Gentle Touch: Mastering Cleaning and Conservation
Cleaning artifacts and structures in heritage conservation isn’t like cleaning your house; it’s an incredibly delicate and nuanced process where the wrong approach can cause irreversible damage.
Over the years, I’ve learned that patience and a deep understanding of materials are far more valuable than brute force. It’s a constant balancing act – removing destructive accretions without altering the original surface or patina.
I’ve personally seen masterpieces nearly ruined by well-intentioned but ill-informed cleaning attempts, and it truly drives home the importance of a scientifically sound, conservative approach.
Every cleaning intervention is a bespoke solution, tailored to the specific material, the type of soiling, and the desired outcome. You need to develop a keen eye for subtle changes and an almost intuitive understanding of how different solvents or techniques will interact with the artifact.
It’s a skill that’s honed through experience, rigorous testing, and a healthy dose of humility, because even after decades, there’s always something new to learn or a new challenge to face.
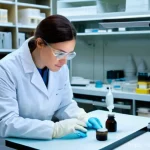
Gentle Chemical Cleaners: A Balancing Act
When it comes to removing dirt, grime, or even old, degraded varnishes, chemical cleaners are often indispensable, but using them is truly a balancing act.
It’s never a one-size-fits-all solution, and you need to be incredibly precise. I remember working on a particularly challenging oil painting where a thick, yellowed varnish obscured much of the original vibrancy.
After extensive testing on tiny, inconspicuous areas, I carefully formulated a solvent mixture that would soften the old varnish without touching the delicate paint layers beneath.
It was nerve-wracking, applying the solution with cotton swabs, meticulously working in small sections, and then neutralizing the area. The transformation was breathtaking, bringing back colors and details that had been hidden for centuries.
But the key was understanding the chemistry, knowing the limits of the materials, and having a *very* steady hand. It’s about minimal intervention, maximum effect, and always prioritizing the long-term preservation of the artwork over immediate aesthetic gratification.
Micro-Abrasive Blasting: When Precision is Key
Sometimes, you encounter a surface that requires a bit more than gentle brushing or chemical application to remove stubborn encrustations. That’s where micro-abrasive blasting comes into its own, but it’s a technique that demands immense control and precision.
I’ve used it on stone sculptures to remove hardened mineral deposits and on metallic artifacts to take off corrosion layers that wouldn’t budge otherwise.
It involves directing a fine stream of abrasive media – often tiny glass beads, walnut shells, or even baking soda – at low pressure through a specialized nozzle.
The trick is to find the right abrasive, the perfect pressure, and the correct distance from the surface to remove only the unwanted layer without damaging the substrate.
It’s an art form, really, requiring a keen eye and steady hand. I’ve personally spent hours fine-tuning the parameters for different materials, and when you get it just right, the results are incredibly satisfying.
The ability to clean intricate details without mechanical contact or harsh chemicals is a game-changer for certain challenging materials.
Holding it All Together: Structural Support and Stabilization
When you’re dealing with ancient structures or artifacts that have stood the test of time, often battling centuries of wear and tear, the focus frequently shifts to their structural integrity.
It’s not enough to just clean them; we often need to ensure they won’t crumble into dust after our intervention. This phase of conservation is immensely gratifying because you’re essentially giving these pieces of history a new lease on life, ensuring they remain stable for generations to come.
I’ve been involved in projects where a historical wall was on the verge of collapse, or a wooden sculpture was riddled with internal decay. In these situations, the tools and techniques for structural support and stabilization become absolutely critical.
It’s about careful engineering combined with a deep respect for original materials and construction methods. The goal is to stabilize, not reconstruct to modern standards, maintaining the historical evidence of its past life and the techniques used to build it.
Grouting and Mortar Application: The Art of Adhesion
One of the most common challenges we face in structural conservation, especially with masonry or stone objects, is voids and crumbling mortar. This is where grouting and precise mortar application become invaluable.
I remember a particularly intricate project involving a medieval stone archway where the original lime mortar had severely deteriorated, creating dangerous structural weaknesses.
We couldn’t just replace everything; that would be too invasive. Instead, we used specialized grouts, carefully injected into the voids to consolidate the existing material and re-establish load paths.
The tools for this range from simple pointing trowels to sophisticated grout pumps with fine nozzles. Applying new mortar requires skill – it needs to match the original in composition, texture, and color as closely as possible, and it must be applied in a way that is structurally sound yet visually integrated.
It’s truly an art to make a repair that holds strong but practically disappears into the original fabric, showing respect for the original craftsmanship while ensuring its future.
Measuring and Monitoring: Keeping an Eye on Stability
Stabilizing a structure isn’t a one-and-done process; it often requires ongoing vigilance, especially for large, complex buildings. That’s where precision measuring and monitoring tools come in.
I’ve used everything from simple crack gauges to sophisticated laser-based displacement sensors and tiltmeters to track the movement of walls or the settling of foundations over time.
On one project, a historic cathedral had some very subtle, long-term movement, and installing an array of these sensors allowed us to precisely quantify the rate and direction of the movement.
This data was absolutely crucial for designing an effective, minimal intervention stabilization plan. Without these tools, we would be guessing, and in conservation, guesswork is a recipe for disaster.
It’s about creating a quantifiable baseline and then continuously observing for any deviations, allowing us to intervene proactively rather than reactively when a major problem arises.
This scientific approach gives us the confidence to make the right decisions and ensures our work stands the test of time.
Safety First, Always: Protecting Yourself and Your Project

I cannot stress enough how vital safety is in heritage conservation. We often work with hazardous materials – solvents, dust, molds, even old lead paint – and sometimes in challenging environments, like dusty archaeological sites or high up on scaffolding.
Over the years, I’ve learned that cutting corners on personal protective equipment (PPE) is just never, ever worth it. Your health and well-being are paramount, and protecting yourself also means you can do a better job protecting the heritage you’re working on.
I’ve had my share of close calls due to rushing or forgetting a piece of gear, and believe me, those moments teach you a valuable lesson. It’s not just about following regulations; it’s about fostering a culture of safety for yourself and your entire team.
A conservator who is sick or injured can’t preserve anything, and an accidental slip can destroy an irreplaceable artifact in an instant.
Respirators and Eye Protection: Guarding Your Health
Working with fine dust from deteriorated plaster or wood, or inhaling the fumes from solvents and adhesives, can have serious long-term health consequences.
That’s why a good quality respirator and robust eye protection are absolutely non-negotiable. I’ve invested in several types of respirators, from simple dust masks for light work to full-face respirators with interchangeable filters for more hazardous tasks involving volatile organic compounds (VOCs).
There’s a particular satisfaction in knowing you’re protected, allowing you to focus completely on the delicate task at hand without worrying about what you’re breathing in.
As for eye protection, I’ve seen too many colleagues suffer eye injuries from flying debris or chemical splashes. Wrap-around safety glasses are a minimum, but for tasks involving chisels, grinders, or strong chemicals, a full-face shield over safety glasses is an absolute must.
Trust me, you only get one set of lungs and one pair of eyes; protect them diligently!
Ergonomic Tools and Supports: Longevity in the Field
Conservation work can be incredibly physically demanding, involving long hours in awkward positions, repetitive motions, and sometimes lifting heavy objects.
This is where ergonomic tools and good personal supports really come into their own. I remember working on a large mural for weeks, constantly bending and reaching, and by the end, my back was screaming.
That’s when I seriously started investing in ergonomic solutions. Adjustable stools, kneeling pads, anti-fatigue mats, and even specialized braces for wrists or backs can make a huge difference in preventing strain and injury.
And it’s not just about comfort; it’s about extending your career and ensuring you can continue to perform intricate, detailed work for years to come without debilitating pain.
Using tools with comfortable, non-slip grips, or opting for lightweight alternatives when possible, might seem like small details, but they add up significantly over a long project.
Taking care of your body is just as important as taking care of the artifacts.
On the Go: Building Your Ultimate Field Kit
Not all conservation work happens in a perfectly equipped, climate-controlled lab. Often, we find ourselves out in the field – at an archaeological dig, in a historic house, or high up on a scaffold in a remote location.
This is where a well-thought-out, versatile field kit becomes your best friend. I’ve learned through trial and error what’s truly essential when you can’t just pop back to the workshop for that one missing tool.
There’s a particular thrill that comes with being prepared for anything, knowing you have everything you need to tackle unexpected challenges on-site.
It’s not just about having the tools; it’s about having them organized, easily accessible, and ready to deploy at a moment’s notice. A good field kit reflects your experience and foresight, proving that you’ve thought through potential scenarios and equipped yourself to handle them gracefully, no matter how rugged the environment.
The Indispensable Field Kit: Ready for Anything
My field kit has evolved significantly over the years, but some items are always there. It starts with a robust, weather-resistant backpack or case that can withstand the rigors of travel and outdoor conditions.
Inside, you’ll find a curated selection of precision hand tools – a small set of picks, spatulas, and brushes – often duplicates of my favorites from the lab.
Then there are consumables: various types of cotton swabs, small containers of common solvents (properly labeled and secured, of course!), adhesive samples, and mixing sticks.
A headlamp or a small, powerful LED flashlight is non-negotiable for inspecting dark corners or working in low light. I also always carry a small camera for quick documentation, a notebook, pencils, and a good measuring tape.
It’s about striking a balance between having enough to be effective and not overloading yourself. Every item in that kit earns its place, because when you’re miles from civilization, what you have with you is all you’ve got.
Portable Power Solutions: Keeping You Going Off-Grid
In the field, access to reliable power can be a huge headache, especially when you need to recharge a camera, power a small drill, or even run a portable diagnostic device.
That’s why having robust portable power solutions is an absolute game-changer. I’ve gone through various iterations, from bulky car batteries with inverters to modern, lightweight power stations.
My current favorite is a compact portable power bank that can recharge my phone, tablet, and even run a small Dremel for detailed work, all without needing an outlet for days.
For larger tools, a high-capacity portable power station with AC outlets is a lifesaver. I remember working on an isolated mural site where the nearest power source was a quarter-mile away.
Having my own power station allowed me to run my specialized lighting for precise examination and even charge my drone batteries for aerial documentation.
It gives you incredible freedom and ensures your work isn’t hampered by a lack of juice, letting you focus on the actual conservation task.
The Art of Repair: Adhesives and Their Secrets
Repairing broken artifacts, reattaching detached fragments, or consolidating friable surfaces often boils down to the delicate art of selecting and applying the right adhesive or consolidant.
This isn’t just about sticking things back together; it’s a highly specialized area of conservation that demands a deep understanding of material science, reversibility, and long-term stability.
I’ve found that the wrong adhesive can cause more harm than good, leading to discoloration, embrittlement, or even structural failure down the line. It’s a field where you absolutely cannot afford to make a mistake, because reversing a poorly chosen adhesive can be incredibly difficult, if not impossible, without damaging the original object.
There’s a real sense of accomplishment when you successfully mend a broken piece of history, knowing that your chosen adhesive will hold strong for decades, yet remain reversible should future conservators need to undo your work.
Selecting the Right Adhesives: A Critical Choice
The market for adhesives and consolidants is vast, and choosing the right one for a specific artifact is one of the most critical decisions a conservator makes.
It’s not about finding the “strongest” glue; it’s about finding the most appropriate one. I always consider the material being bonded (stone, wood, ceramic, textile, metal), the environmental conditions it will face, and, crucially, the principle of reversibility.
Ideally, any adhesive we use should be able to be safely removed in the future without damaging the artifact. I’ve spent countless hours researching different formulations – acrylic resins, cellulose ethers, epoxy resins – understanding their properties, their aging characteristics, and how they interact with various substrates.
For example, for a porous ceramic, I might opt for a relatively dilute consolidant that penetrates deeply, while for a structural repair on wood, a reversible epoxy might be more suitable.
It’s a nuanced decision, and often involves extensive testing on mock-ups or inconspicuous areas of the object.
Application Techniques: Mastering the Delicate Touch
Once you’ve chosen your adhesive, the application technique itself is another skill that requires immense practice and a delicate touch. It’s not like spreading glue on paper!
We often work with tiny fragments, or need to inject consolidants into microscopic cracks. Tools like micro-pipettes, fine-tipped syringes, and incredibly thin spatulas become essential.
I remember one project where I had to reattach a shard to a very delicate glass vase. The adhesive had to be applied with such precision that it only coated the break edges, without oozing onto the pristine surface.
It took a steady hand, perfect lighting, and breath control to get it just right. Similarly, for consolidating flaking paint on a canvas, you might use an ultrasonic humidifier to relax the paint layers, then carefully introduce a tiny drop of consolidant with a fine brush, followed by gentle pressure to re-adhere it.
It’s a slow, meticulous process, often requiring magnification, but the satisfaction of seeing a fragile piece made whole and stable again is truly unmatched.
Wrapping Things Up
As we’ve journeyed through the intricate world of heritage conservation, from the trusty hand tools that feel like extensions of your own hands to the cutting-edge tech that reveals hidden narratives, it becomes incredibly clear that this field is a beautiful blend of art, science, and unwavering dedication. It’s a craft that demands precision, patience, and a deep respect for the stories embedded within every artifact and structure. For me, every project is a unique puzzle, an opportunity to learn something new and to leave a piece of history a little more secure for future generations. The satisfaction of preserving these irreplaceable treasures is truly immense, and it’s a privilege I cherish every single day. Remember, it’s not just about the tools you use, but the passion and expertise you bring to the table.
Useful Insights for Your Journey
1. Never Stop Learning: The world of conservation is constantly evolving. New materials, techniques, and technologies emerge all the time. Staying curious, attending workshops, and reading up on the latest research isn’t just a good idea – it’s absolutely essential. I’ve personally found that the moment you think you know it all, is the moment you stop truly growing in this field. Embrace every chance to expand your knowledge base!
2. Networking is Gold: Connect with other conservators, archaeologists, historians, and scientists. Sharing experiences, discussing challenges, and seeking advice from peers has been invaluable in my career. Some of my most insightful breakthroughs came from casual conversations over coffee with someone who had tackled a similar problem. Building a strong professional community isn’t just about contacts; it’s about collaborative problem-solving and shared passion.
3. Test, Test, Test (Ethically!): Before applying any treatment to a precious artifact, always, always perform tests on inconspicuous areas or mock-up samples. This is a golden rule! Understanding how a material will react to a solvent or an adhesive can prevent irreversible damage. I can’t tell you how many times a tiny test patch has saved me from a major headache (and a potential disaster!). It’s about being thorough and minimizing risk.
4. Documentation is Your Best Friend: Every step you take, every material you use, every decision you make – document it meticulously. Detailed records aren’t just for you; they’re for future conservators who might need to understand your interventions. Think of it as leaving a clear map for those who come after you. My personal experience has taught me that the more detailed your notes, the easier it is to trace an object’s treatment history, which is crucial for its long-term preservation.
5. Prioritize Safety, Always: As we discussed, conservation often involves working with hazardous materials or in challenging environments. Make personal protective equipment (PPE) your non-negotiable companion. Your health is paramount. I’ve learned that a healthy, safe conservator is a truly effective conservator, and protecting yourself means you can continue to protect our shared heritage for years to come. It’s not just a rule; it’s a way of life in this profession.
Key Takeaways for Enduring Preservation
Ultimately, successful heritage conservation hinges on a delicate balance: honoring traditional craftsmanship with the precision of modern science. My journey has shown me that while high-tech diagnostics offer incredible insights, the fundamental skill and intuition honed by working with hands-on tools remain irreplaceable. The ethical responsibility to ensure reversibility, prioritize safety, and meticulously document every step is paramount. It’s a field where continuous learning, collaborative spirit, and a deep, empathetic understanding of the past converge to secure the future of our shared cultural legacy. Every single day, we’re not just fixing objects; we’re actively safeguarding stories, ensuring they resonate for generations to come, truly making a difference in how we connect with history.
Frequently Asked Questions (FAQ) 📖
Q: When I’m just starting out in heritage conservation or preparing for those big certification exams, it feels like there’s a mountain of tools out there. What are the absolute non-negotiables, the core kit I should invest in first, to really set myself up for success without getting overwhelmed?
A: Oh, I totally get that feeling! Walking into a conservation supply store for the first time can be like stepping into a candy shop for a kid – exciting, but where do you even begin?
From my own experience, when you’re just dipping your toes in or getting ready for those critical certifications, it’s all about precision and gentleness.
Your core kit should definitely include a really good set of high-quality surgical scalpels with various blade shapes (think a No. 11, No. 15, and a curved blade for starters), alongside a selection of fine-tipped brushes – natural bristles for dusting and synthetic ones for solvent application.
Don’t forget a sturdy magnifying visor or a loupe; you’ll be peering at tiny details constantly, and eye strain is no joke! A set of dental tools or micro spatulas, some made of stainless steel and others of bamboo or wood, are invaluable for delicate lifting and probing.
And please, invest in proper personal protective equipment (PPE) like nitrile gloves and a good quality respirator, especially when dealing with any chemicals.
I remember once trying to skimp on a cheap magnifying glass early in my career, and it nearly cost me a crucial detail on an antique manuscript. Spending a little more upfront on these essentials will save you headaches, time, and potentially an artifact down the line.
It’s about building a solid foundation, piece by painstaking piece.
Q: We hear so much about cutting-edge technology these days, from 3D scanning to
A: I. How are these new advancements truly changing the game in heritage conservation, and how can someone like me, who’s used to more traditional methods, actually start incorporating them into my work without feeling completely out of my depth?
A2: That’s a fantastic question, and it’s one that’s always buzzing in our circles! Believe me, the influx of new tech can feel a bit like a whirlwind, but it’s honestly making our work more precise and less invasive, which is a huge win.
Technologies like multispectral imaging and X-ray fluorescence (XRF) are absolute game-changers for non-destructively analyzing materials and hidden layers in paintings or documents.
I’ve personally seen how 3D scanning allows us to create incredibly accurate digital twins of fragile objects, perfect for virtual reconstruction or even printing replacement parts.
And laser cleaning? It’s revolutionary for removing grime from stone or metal without any harsh chemicals. For someone accustomed to traditional methods, my advice is to start small.
Look for local workshops or online courses that focus on specific technologies you’re interested in. Maybe try collaborating with a colleague who’s already dabbling in 3D scanning on a small project.
I recall being skeptical about photogrammetry at first, thinking it was just a fancy gimmick. But after trying it on a moderately damaged sculpture, seeing the detailed model we could create for documentation and planning, I was absolutely hooked.
It’s not about abandoning your trusted hand tools; it’s about having a powerful new set of analytical and restorative aids in your toolkit.
Q: With the sheer variety of conservation projects, from textiles to architecture, how do you manage to choose the right specialized equipment for each unique challenge without ending up with a workshop full of tools you rarely use? What’s your secret to making smart, cost-effective choices?
A: This is where the rubber meets the road, isn’t it? It’s easy to get carried away and buy every cool tool you see! My secret, if you can call it that, is deeply rooted in understanding the material science and the specific degradation mechanisms of the artifact I’m working on.
Before I even think about buying a new piece of kit, I ask myself: “What is this artifact made of? What are its vulnerabilities? And what precisely am I trying to achieve?” For example, if I’m restoring a delicate paper document, I’ll prioritize specialized tools for humidification, precise tear repair, and archival storage, rather than, say, heavy-duty woodworking clamps.
I’ve learned the hard way that a specialized tool, even if used infrequently, can be absolutely indispensable for one critical project. A prime example was a time I had to consolidate a friable ceramic piece; investing in a vacuum consolidator, though pricey, was the only way to effectively stabilize it without further damage.
Instead of buying everything, I focus on multi-functional tools when possible, and for truly niche items, I sometimes rent, borrow from a trusted colleague, or even fabricate a custom tool if it’s a one-off need.
Always talk to other conservators, read case studies, and attend webinars. Their insights often highlight overlooked solutions. It’s about being strategic, not just accumulating!